
Most people who raise strawberries do not start them from seed. They buy strawberry plants from a local nursery or a mail-order nursery. They then receive, most often, dormant strawberry crowns that they quickly plant in their prepared beds, water them, and watch as the dormant strawberries spring forth into new life.
However, there are brave souls out there that want to begin the life cycle of their strawberries by germinating strawberry seeds and then coaxing the tiny seedlings to grow until they are ready to transplant. With all the TLC given to the tiny plants, it would be a shame to make a mortal mistake for them when they are finally sturdy enough to make the transition to the outside.
This post will help you successfully transplant strawberry plants that you have germinated. It is best to know what TO do and what NOT to do before risking potential damage or death to your fledgling shoots!
Jump to:
Handling Strawberry Seedlings
Strawberry seedlings grow from tiny strawberry seeds, and, consequently, begin their lives as very small plants. This makes them vulnerable to damage from the wind and elements, but it also makes rough handling a potentially deadly affair. So, before moving on, it is important to understand how to handle strawberry seedlings.
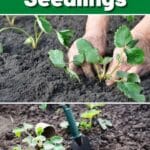
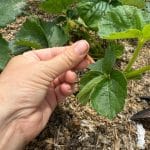
First, it is best not to handle them at all until they have grown from a sprout into a small plant with multiple leaflets. Then, if the seeds were planted in seed-starting mix or seed-starting trays, it is best to avoid touching the vegetative parts of the plants altogether. Loosen the edges of the root/soil ball and lift the entire plant by the compressed soil/roots or invert and tap the bottom of the container if it isn’t fully loosened. If the vegetative matter must be touched, avoid touching the stem, if possible. Strawberry plants are forbs and do not have supportive woody tissue. So, undue pressure on the “stalks” holding the leaflets aloft can cause the entire 3-leaflet photosynthesis factory to be lost. It is better to be very gentle and lift by the actual leaflets, if they must be used. But, with strawberry seedlings, the development of the crown at the soil level (see the Strawberry Plant reference page for anatomy) is the most vital anatomical part, so don’t fret too much if your strawberry seedling looses a leaf. What is often much more deadly than clumsy fingers is Mother Nature.
Hardening Strawberry Seedlings
Plants that are grown from seed are often started indoors. Strawberries are usually not an exception. Since they are most commonly started indoors, they must undergo a process called “hardening” or “hardening off” in order to be tough enough to survive the (sometimes brutal) transition from the sheltered life of indoor living to the “real world” outside in the garden or strawberry patch. To make the transition a successful one, follow these tips:
1. Be patient. The hardening process can take up to two weeks, so remember that slow and steady often wins the race.
2. Be considerate. Just like people are wont to do, strawberry seedlings get accustomed to their surroundings. Take the time to understand the conditions the plants enjoy and transition them to their new environment slowly. Strawberry plants are hardy and can adapt to many temperatures and most conditions, just not all at once. Set them out in the sun, wind, and elements gradually. Increase the amount of time your future producers are exposed each day before bringing them back into their comfortable lair. By the end of two weeks, they’ll be ready to embrace their new home in the ground.
3. Choose the right conditions. Even if your strawberry seedlings are toughened up perfectly by the hardening off, it is still stressful to transition to a new home. So, pick a day to plant them when it is cloudy and overcast with fog and rain forecasted, if possible. If those ideal conditions aren’t going to present themselves, decrease the amount of initial sun exposure by putting them in the ground in the late afternoon or evening.
4. Prepare the seedlings new home! The day before you are to plant, water the soil where they are to be planted well. This will provide appropriate moisture to make the new dirt occupants happy.
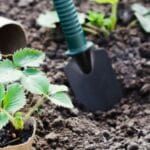
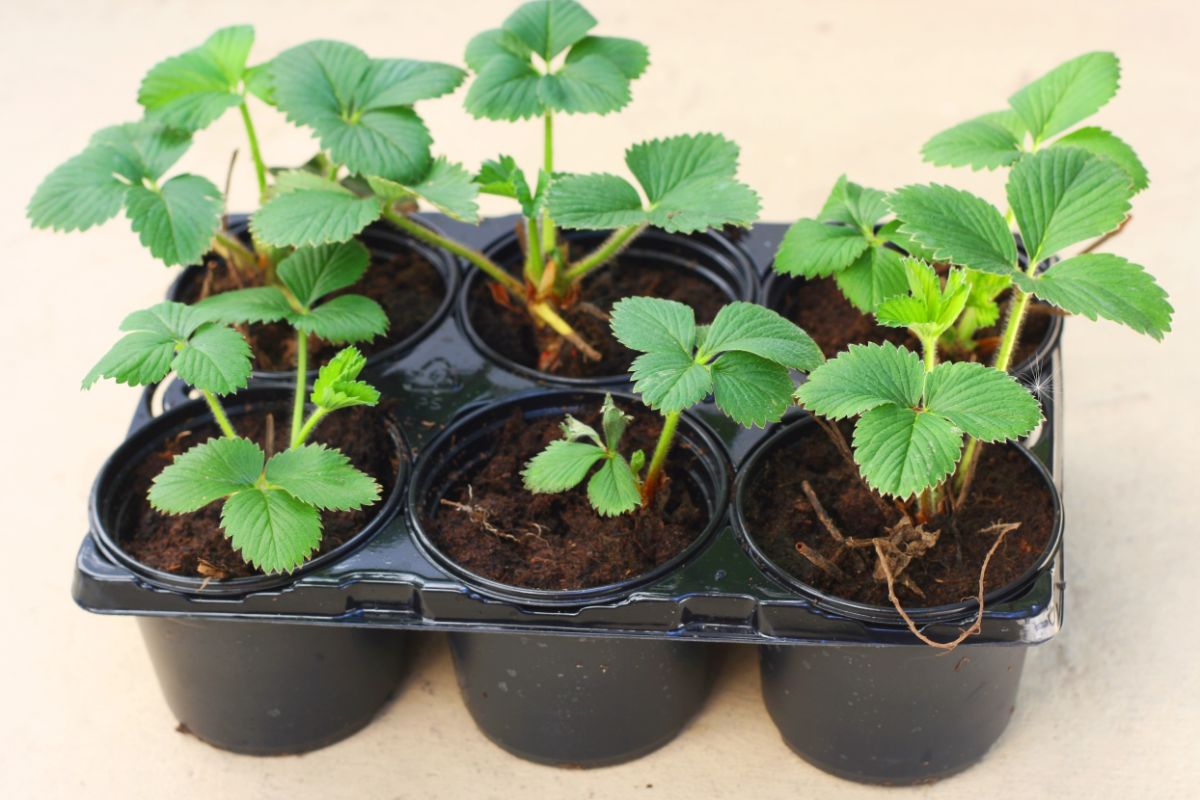
Planting Strawberry Seedlings
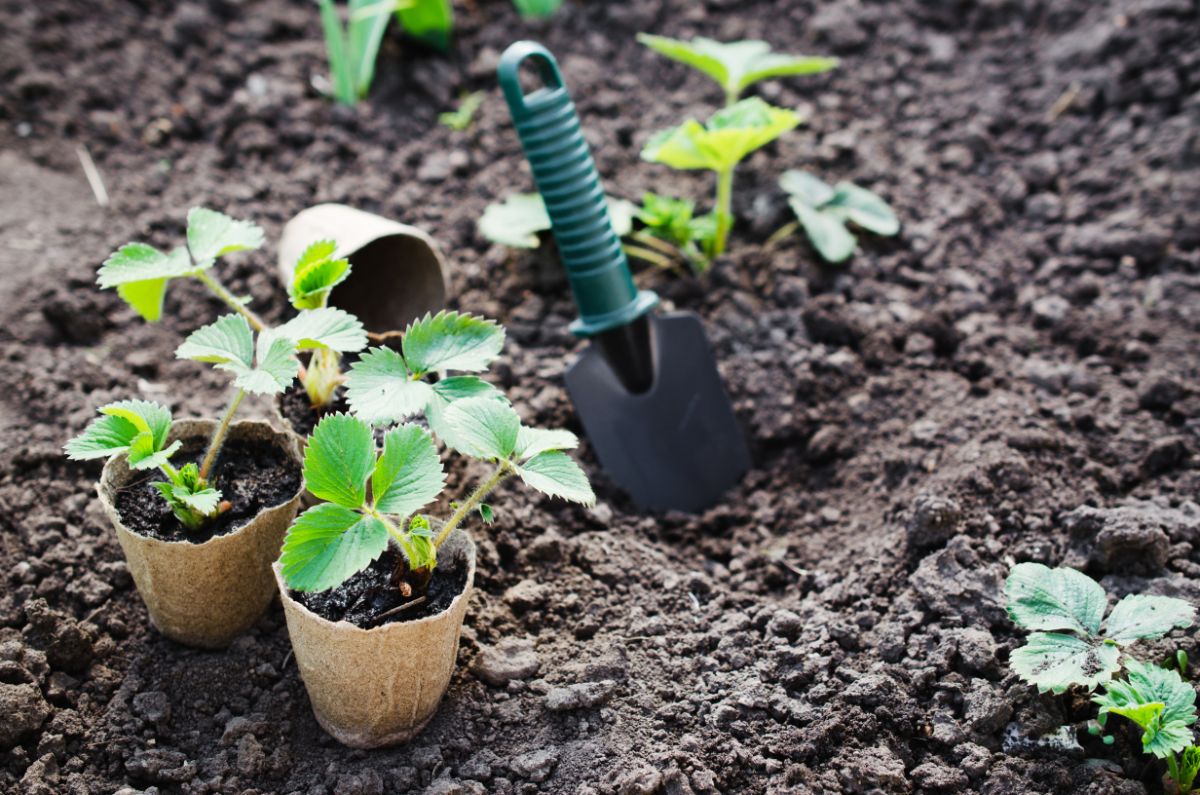
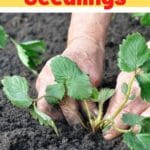
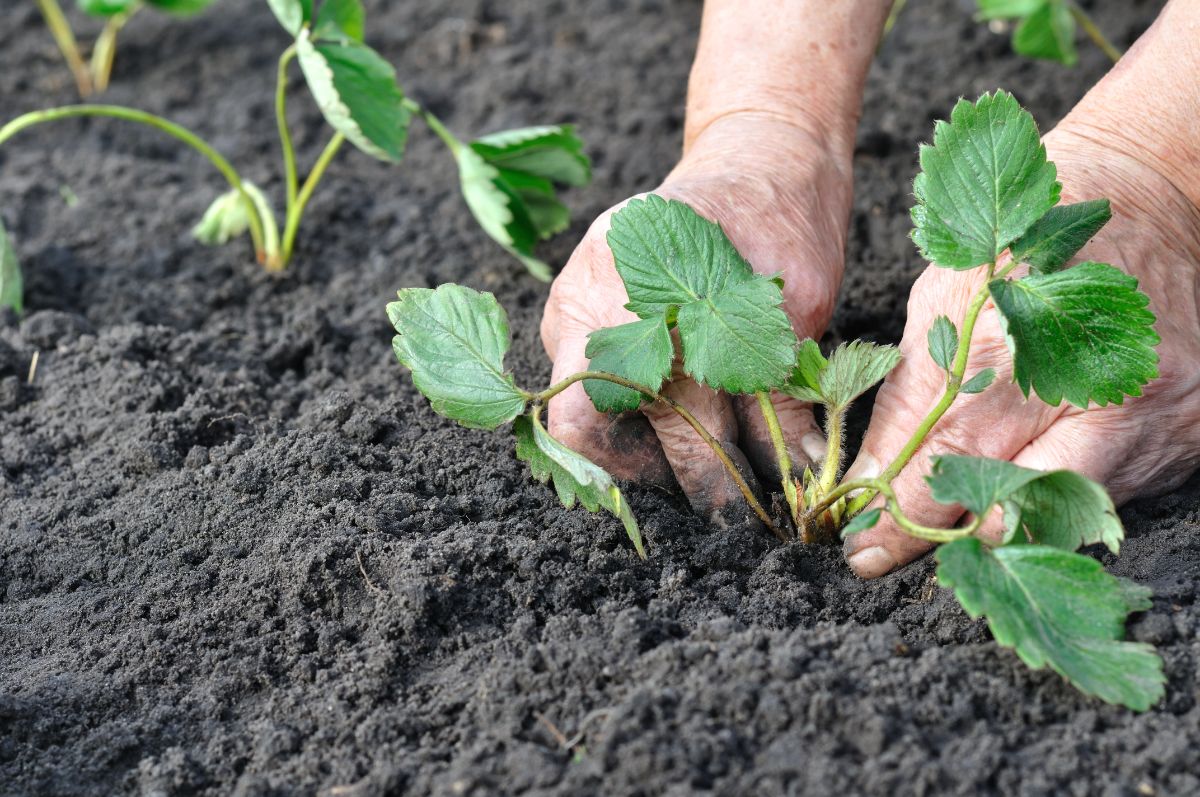
Once you have done the above, your strawberry seedlings are ready to be planted! When planting strawberry seedlings, be sure to keep them all in the shade until you are ready to put each one in the ground. Dig the hole first, remove the plant from its sprouting container, and put it in the ground so that the crown is at dirt-level (see the Growing Strawberries reference page for a diagram). If any roots are damaged, they can be carefully snipped with fine scissors or shears.
If your strawberry seedlings were planted and germinated in peat pots, cut an “X” in the bottom of the mesh with a sharp knife (be careful!) to allow the roots unobstructed passage from the germination medium into the surrounding soil environment. Once planted, remove any visible mesh material as it will serve as a wick to draw water out of the ground and may cause excess evaporative loss and dry soil.
Strawberry Seedlings: Conclusion
If you have never tried growing strawberries from seed, give it a try. It is rewarding to take a tiny seed and provide the needed care, nutrients, and wisdom to bring forth a fully viable strawberry plant that rewards your effort with a harvest of delicious strawberries! If you have decided to take the plunge and don’t have a source for strawberry seeds, you can find them here: Strawberry Seeds for Sale.
Good luck!

Al says
I have seedlings from store bought strawberries that are about 2in tall and planted in a 2 x 2 seedling tray. They won’t make it outside because it’s October here in Michigan. Do I need to transplant these seedlings now or can I wait till spring after keeping them in an indoor greenhouse. Thanks
Pp.K.Chatterjee. says
I have bought 6nos small strawberry plants 2months ago from the market, planted in pots ,after few days started keeping under sun. Today one flower is seen on one sapling,should I destroy the flower? which fertiliser is best to use,temp. in Delhi is high ,40’C during day,should I keep the plants under shed,I water them regularly.Please send your comments.
Adeel Ahmad says
Hi, I want to know *how much time strawberry it takes to develop into good seedlings which are best able for transplantation after germination??
Abdullah Munir says
15 to 25 days plants are best for this*
Shahani Libarnes says
Hi!
I bought a strawberry plant but it died when I put a 14-14-14 fertilizer. I was able to save some seed though but the thing is that 1-2 weeks after the seed germinated, the seedling will dry out and die. I put water every day. I’m really bothered about it. Please help.
Patrick says
Hello :),
When my strawberry germinated and i transfer to new a pot but it keep dying after a few days even it have enough sunlight..what did i do wrong?..
Jennifer says
My strawberry seedlings haven’t grown their first real leaves yet and its been several weeks. Any suggestion on how to get past the baby leaves to real leaves? They sprouted to about half inch height and stopped.
Mr. Strawberry says
Jennifer,
If they are indoors, try increasing the amount of light exposure. Good luck!
Jane Lewis says
I have either gaviota or seascape 1mm plants I started from seed. They are currently in pots.
Will this type of berry grow in coastal R.I.? If so, would it make sense to plant them outside in the fall or winterize them in my garage, planting next spring?
Thank you.
Mr. Strawberry says
Jane Lewis,
They may survive and do fine, but both Gavoita and Seascape are hybrids and unlikely to grow true from the seeds you planted (I assume you collected them from the strawberries themselves?). So, you might do better purchasing either bare-root strawberry plants or strawberry plugs. If you keep the plants you grew from seed, keeping the pots in the garage and watering them enough to keep the soil from drying out should keep them alive. However, it would be best to go ahead and plant them in their permanent location in the fall. See the this on transplanting. Good luck!
!
Amanda Rampy says
I planted a whole strawberry, will it grow?
Mr. Strawberry says
Amanda Rampy,
It is unlikely. If there are a few seeds close enough to the soil surface, they might germinate and grow into a strawberry plant. However, most buried strawberries never grow into plants. Good luck!
Leigh says
Hi Mr. Strawberry,
I love gardening but have to be honest. I am lazy about it. I typically buy the plants and point to the spot I want them and let my husband do the planting. Then I care for them. My question for you is. Living in New England and having a mild winter. Can I sow the seeds right in the soil outside? I’m thinking they will harden off and sprout in the spring.
Thanks!
Mr. Strawberry says
Leigh,
Yes, you can, but I’d recommend starting them indoors. You will lose some to consumption by hungry animals, and the germination will be uneven. Additionally, you will likely need to euthanize a lot of them if they are spaced too closely. But, yes, it will work if you wish to go that route. Good luck!
Mansi says
Hello Mr Strawberry,
I wanted strawberry plant in my small garden. Since the nurseries nearby do not sell strawberry plants, I decided to grow them from seeds. I planted seeds from store bought strawberries, and the germinate alright but died in couple of days. PLEASE help me. What should I do.
Mr. Strawberry says
Mansi,
Even if the strawberry plants lived, there would be no telling what grew. Virtually all strawberries in the stores are hybrids and will not grow true from seed. You would probably have better success with either transplanting a known variety from a friend or neighber, or you can order live plants of known varieties and have them delivered to your door. Good luck!
Angi says
Can I plant a freshly cut strawberry cap (stem, leaves,and strawberry fruit) and have it grow a strawberry plant.
Mr. Strawberry says
Angi,
Unfortunately, no. Strawberry plants can’t propagate like pineapples do. Here is how they CAN propagate!
Ila says
Mr strawberry I’m far from a green thumb gardener but I like the challenge. My kids recently forgot about the strawberries we bought at the store two weeks ago and since most were to soft to eat they cut off any soft or bad spots an planted the good parts along our fence line. I’m pretty sure it’s impossible to grow strawberries by just tossing old strawberries in a shallow hole an covering with dirt an compost but I think I may see some seedlings or jagged weeds but sure look like strawberry plants just wondering is it possible to grow this way! I’m so surprised an it would be huge to the kids if they r strawberry plants!
Mr. Strawberry says
Ila,
Yes, you can grow strawberries from seed. Good luck!
krystal says
I started two different heirloom varies from seed this year. My question is do you thin them? Or thin them when they’re ready for transplant? Do you recommend pinching the flowers the first year to build better roots?
Thank you for your wonderful website!
Mr. Strawberry says
krystal,
Do make sure that each seedling has enough room to put down roots individually so that their roots don’t get too intertwined. That makes transplanting later damaging to at least one of them. Yes, pinch off any flowers this first year to help them establish themselves more fully. Good luck, and thanks for the kind words!
Albie Dorsey says
I bough? t 6 so called King Kong strawberry plants and I’m following the instructions that came with plants. They were bare root plants with no dirt on them and some will be planted in the ground others will be planted in pots. Any suggestions to get the best crop? They suggested 10 30 10 fertilizer and the potting soil I have is exactly what the suggested.
Mr. Strawberry says
Albie Dorsey,
As a matter of fact, yes! Just see here. Good luck!
Trina Mailloux says
Hello, I have started several strawberries from 3 different sources and they are all doing well and are about 2 inches high. Some seeds I purchased and some I harvested from groceries store strawberries. My question is, the ones I harvested are quite healthy looking but appear to have fuzzy leaves. They are in trays next to ozarks and alpines, but it is only the harvested seedlings that apparent fuzzy. Again, they all look healthy, are there some types that grow like this? None of the others have this appearance and are within inches of the fuzzy looking ones. The original strawberries were purchased at Walmart and were Driscoll brand.
Thanks for any help you might provide.
Mr. Strawberry says
Trina Mailloux,
Some strawberries do have small “hairs” on their leaves. The store-bought strawberries are almost certainly hybrids, and strawberry plants grown from hybrid seeds usually manifest different genetic characteristics than either of the parents that contributed the genetic material contained within the seeds. They should do fine, however, so I wouldn’t worry about the fuzziness unless it becomes evident that the fuzz is actually mold. Good luck!
Janne Thiebaud says
Hi Mr Strawberry,
After much research, I found your website last Spring, and use it exclusively for trusted information, being an absolute novice at growing strawberries. Last Spring I had six plants, from which I was able to get another 77 from the runners they threw. I did not allow any of them to fruit. Most of them are in small pots, and will need to be potted up into large pots and hanging baskets. It is now August here (Australia) mid Winter. When should I pot them up? I am feeling it is about now, or very soon. I didn’t want all my hard work last Spring to go to waste, and am looking forward to having lots of strawberries this year, given they have all been over wintered. Any advice will be greatly appreciated. Thank you in advance.
Mr. Strawberry says
Janne Thiebaud,
You should plant them as soon as the ground thaws completely. You should have a nice crop this year! Good luck!
Sanj says
Thanks for your advice!
Sanj says
Hello again. Can you give me some useful tips on how best to care for my tiny strawberry seedlings? They are currently between 0.5 and 1 inch tall, and they look very fragile! As you said, they need to be a couple of inches before I can transplant them, so how can I make sure that they survive that long? Do I need to keep the soil moist at all times, or should I wait for the soil to dry out between watering? And I understand that I should keep them indoors at all times, and out of direct sunlight, is this correct? Thanks for your help.
Mr. Strawberry says
Sanj,
Yes, if they have been inside up to this point, putting them in direct sunlight at this point will kill them. You’ll need to harden them off once you’ve transplanted them into their own containers before putting them into direct light. Also, don’t let the soil dry all the way out. That will also stress or kill them. Keep the soil most-but-not-soggy.
Sanj says
Hello. Congratulations on having such an excellent and comprehensive website. I have found it very useful. I have a question:
I planted several Sarian F1 Hybrid seeds between 9 and 13 weeks ago. I planted them in a seed tray and kept them indoors. Just under half have turned into seedlings (7 of them), ranging in height from 1cm to 3cm, approximately. The idea is to transplant them into hanging baskets. My question is this: at what height should the seedlings be before I can translant them into the baskets? In other words, when can I transplant them? (I know that I need to harden them off first). Thanks for your help.
Mr. Strawberry says
Sanj,
Strawberry seedlings are tiny and delicate, as you’ve seen. The major threat during transplanting them is damage or undue stress on the little plant. You can transplant them as soon as you can do it gently without disturbing or damaging the seedling and its roots. When I have sprouted seedlings in past years, I usually waited until the seedlings were about 2 inches tall. This can take quite some time, however, and it is ok to transplant them before. I also used peat pellets most successfully, as they allowed me to pick up and move the entire seedling plant without disturbing the roots. Good luck, and thanks for visiting!